Items
Item Entry / Checkoff Screen
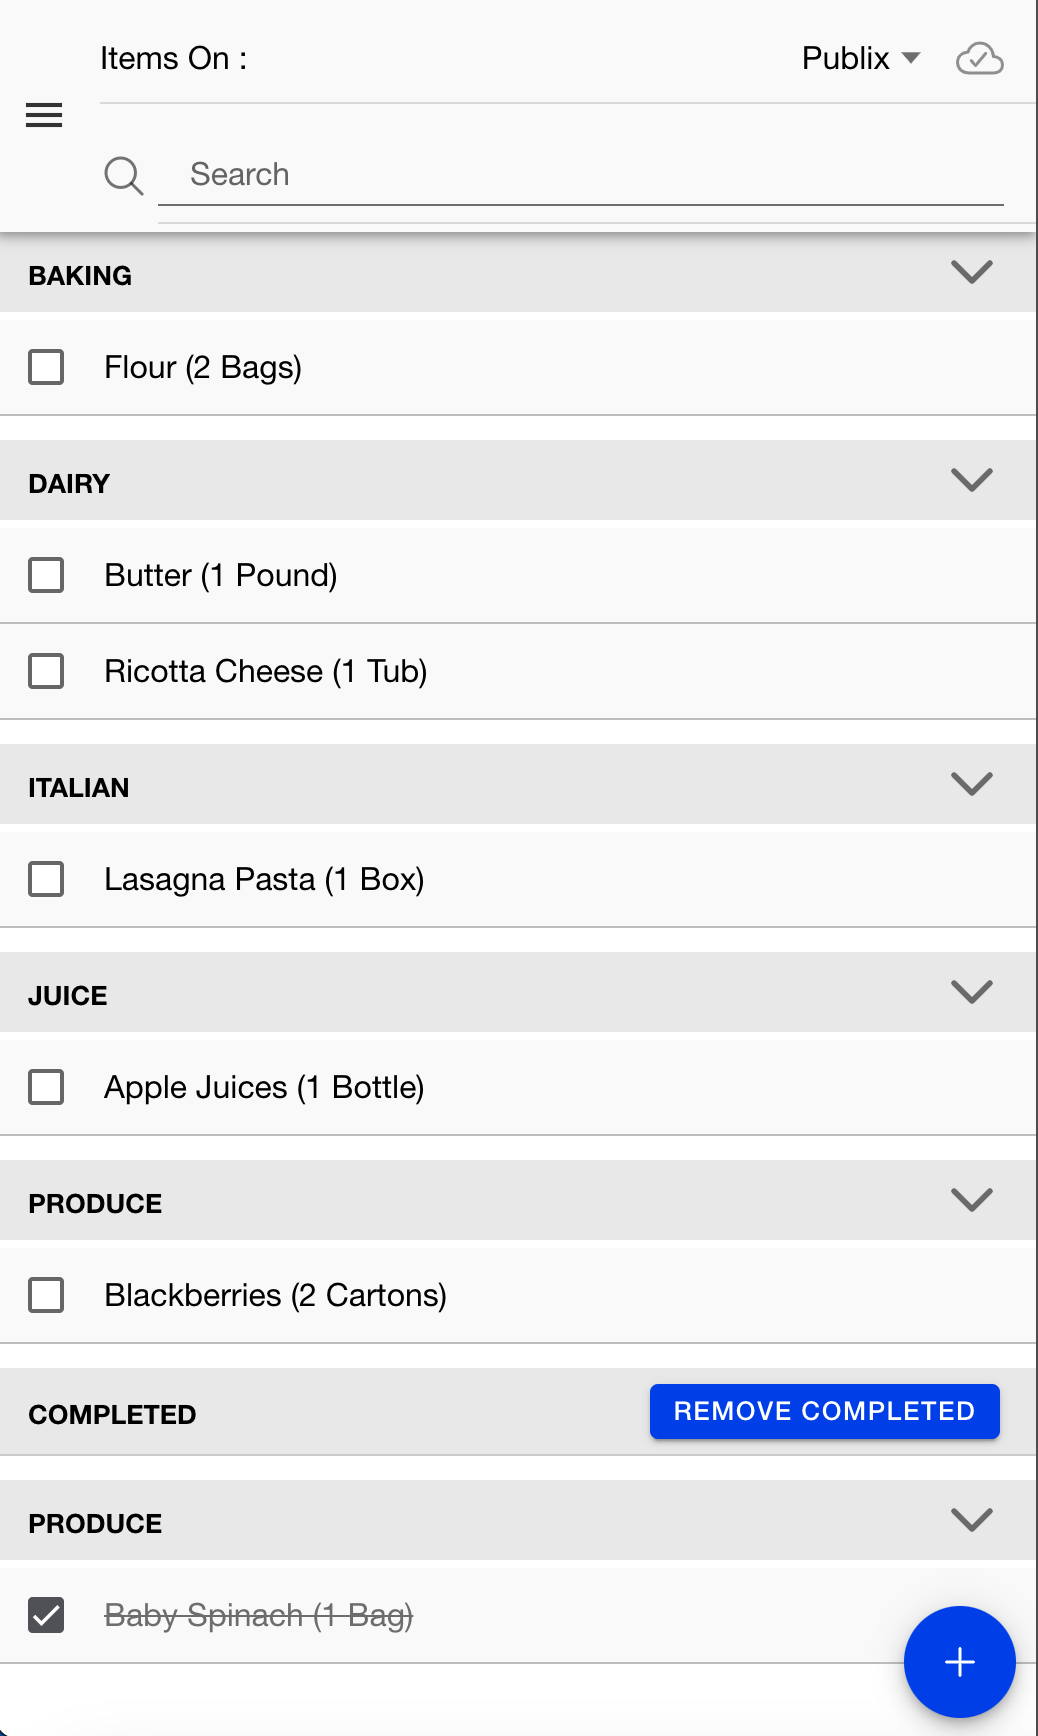
This screen is really the heart of the application. At the top of the application there is a search bar where you can search for and easily add items that are in the global pre-populated list or those that you have previously entered. The next section allows you to "check the item off" the list when you have purchased it by clicking on the checkbox. If you click on the name itself, you will be taken to the item editor where you can change quantity, unit of measure, or category.
The items are listed in order by category. These are listed in the order that the categories are arranged in the list editor.
After all of the "active" items on the list, the app will show that the checked off items, as well as a button to delete or clear the completed items.
Each category/aisle can be expanded or collapsed by clicking on the chevron to the right of that category name. In addition, each category can be assigned a color (specific to the user) which will then appear as a colored bar underneath the category name.
The item entry screen works slightly differently depending on whether you have selected a list group in the upper right hand corner or a list. If you have selected a list group (this would be the most common way when you are adding items to the list), then every time you create a new item it is added to all of the lists in the listgroup. The main difference with choosing a list is that then you get the correct sorting by category that the store has, as defined in the list editor. You would typically use list mode when shopping for the items at the store.
Searching for items
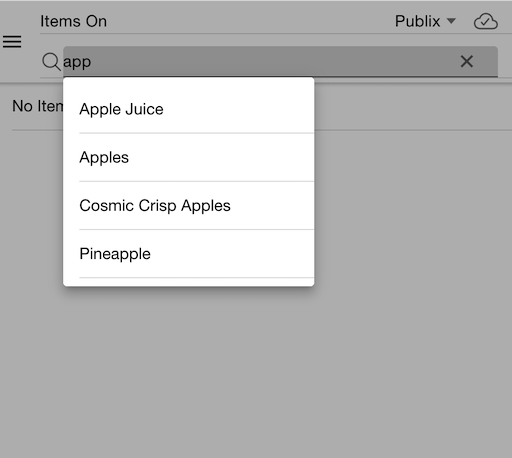
When you first enter the search bar, a list of all available items to add to the list will appear. Items that you've purchased before will sort towards the top of the list based on number of times purchased at the store, so you can easily add the items you always buy.
As you start typing, the list will be filtered by the letters typed in to the search bar.
Item Editor
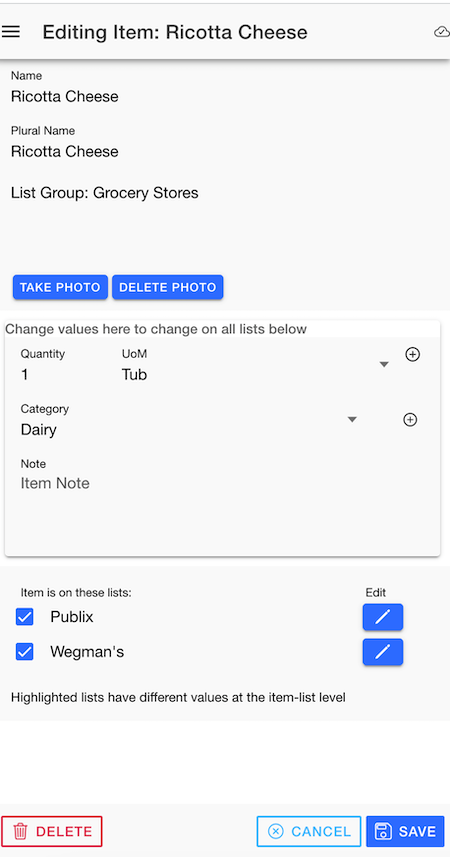
The item editor allows you to change the name of the item (only if it isn't one of the pre-supplied items). It also allows you to select the category that the item is in (which determines the sorting position in the store). You can also change the quantity and unit of measure on this screen, as well as provide a note for the item.
A photo can also be stored to help make sure the right item for purchase can be identified.
On this screen, if you enter a value for quantity, unit of measure, or note, they will be applied to every list that the item is on. This is probably the "standard" way you would want it to work, but there are certain cases where you might want to buy 2 bunches of bananas at Publix, where they are always greener, and 1 bunch of bananas at Wegman's where they are riper. If you want to change any of the values individually at the list level you can click on the bottom part of the screen on the pencil button by the list. Items will be shown there highlighted if there are any differences from that item and the rest of the items.
Here you will see this screen:
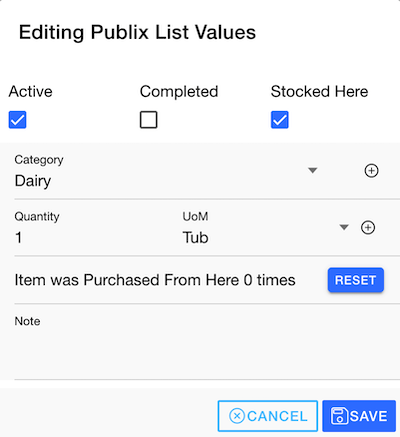
Here you can change the following values:
- Active -- this is the same as being "on" the list and available for shopping
- Completed -- the item is "checked off" on the list and would appear at the bottom of the item entry screen
- Stocked Here -- this is maintained so you can denote whether an item is available in a specific store. This can be useful if you want to use a list group with multiple stores, where for instance, the Publix doesn't carry Birch Beer but the Wegman's does. When adding to a list, the app will never add to stores that don't stock the item.
- Category - an item could be in a different section of one store vs another. For example, the Publix might carry Soy Sauce in the "Asian" section, but the Wegman's has it in the "Condiments" section.
- Quantity - you might want to buy a different quantities of the same item in different stores.
- Reset -- The number of times the item has been purchased from the store -- used in item sorting in the search bar. You can reset this if desired by clicking on the reset button.
- Note - A different note can be maintained for each store.